3 weeks: newborn cloth diaper
Boy was I wrong.
I visited my friend Carolyn, who was using cloth diapers on both of her little girls. They looked like a MUCH cuter version of disposables! Just as easy to put on and take off, the only difference being that you washed them instead of throwing them away. I thought, "I can do that!" So I did what I always do before making a really big decision: research! Turns out there are lots of kinds of cloth diapers, including the old-fashioned ones you have to fold. But there have been many technological advances in cloth diapers in the last 5 years!

5 weeks: Flip diaper & cover
I looked at many different factors as to why or why not to use cloth diapers:
Convenience: For both disposables and cloth, you velcro the diaper on the baby, take it off, and throw it in a pail. For cloth, you wash them. For disposables, you throw them away. I felt like I do so much laundry anyway, what are a few extra loads a week? Plus, it is illegal to toss human waste into landfills. If you read the box of disposable diapers, the instructions say to shake waste off into the toilet before disposing of the diaper. If I'm going to do that anyway, it may as well be from my cloth diapers. We received a diaper sprayer from our baby registry. It's basically the same thing that's attached to your kitchen sink, but attached to the toilet and with a variable pressure to spray out poopy diapers once our daughter started solids. Much more convenient! We have even traveled with cloth diapers. We decided, however, that for car trips, we will use cloth, but for plane trips, we will use disposables. It's just too difficult to find convenient and affordable washers/dryers in hotels.
Bulkiness: Cloth diapers are more bulky, so the baby often wears one clothing size larger than s/he would have in disposables, since today's baby clothing is made to fit over disposables.
Baby's health: Most disposable diapers contain chemicals, including the bleaching chemical, dioxin, which is known to cause cancer. Even if you buy the natural cotton unbleached disposable diapers, they still have the gelling chemical to contain liquid matter. Cloth diapers are much more natural, cause less diaper rash and feel better on baby's skin. Also, cloth-diapered babies are often potty-trained sooner because they have the ability to feel the wetness.
Environment: Though cloth diapers do cost more in energy and water to wash than disposables do, disposables have way more of an impact both in manufacturing and in disposal for our planet. A disposable diaper can remain in a landfill for 500-600 years. (visit the link on dioxin to see more statistics). So all those disposable diapers my mom used on me in the 80's are still around somewhere. Yikes. A cotton diaper takes around 6 months to biodegrade. This is the one that got me on board.
Cost: This is the one that really got Daniel on board. For about 4 month's worth of the cost of disposables for one baby, we could buy enough cloth diapers to last from birth to potty-trained. And then reuse the same diapers for ALL of our children! And then sell them when the last child is potty-trained to recoup some of the cost. On average, disposables cost about $66/month per child, which is $792/year and $1584/lifetime, assuming your child wears diapers for only 24 months. Per child. The cloth diapers we bought cost us around $250. For our baby and any siblings she may have. We got a middle-of-the-road option; there are much more affordable diapers out there, and many more expensive ones as well.

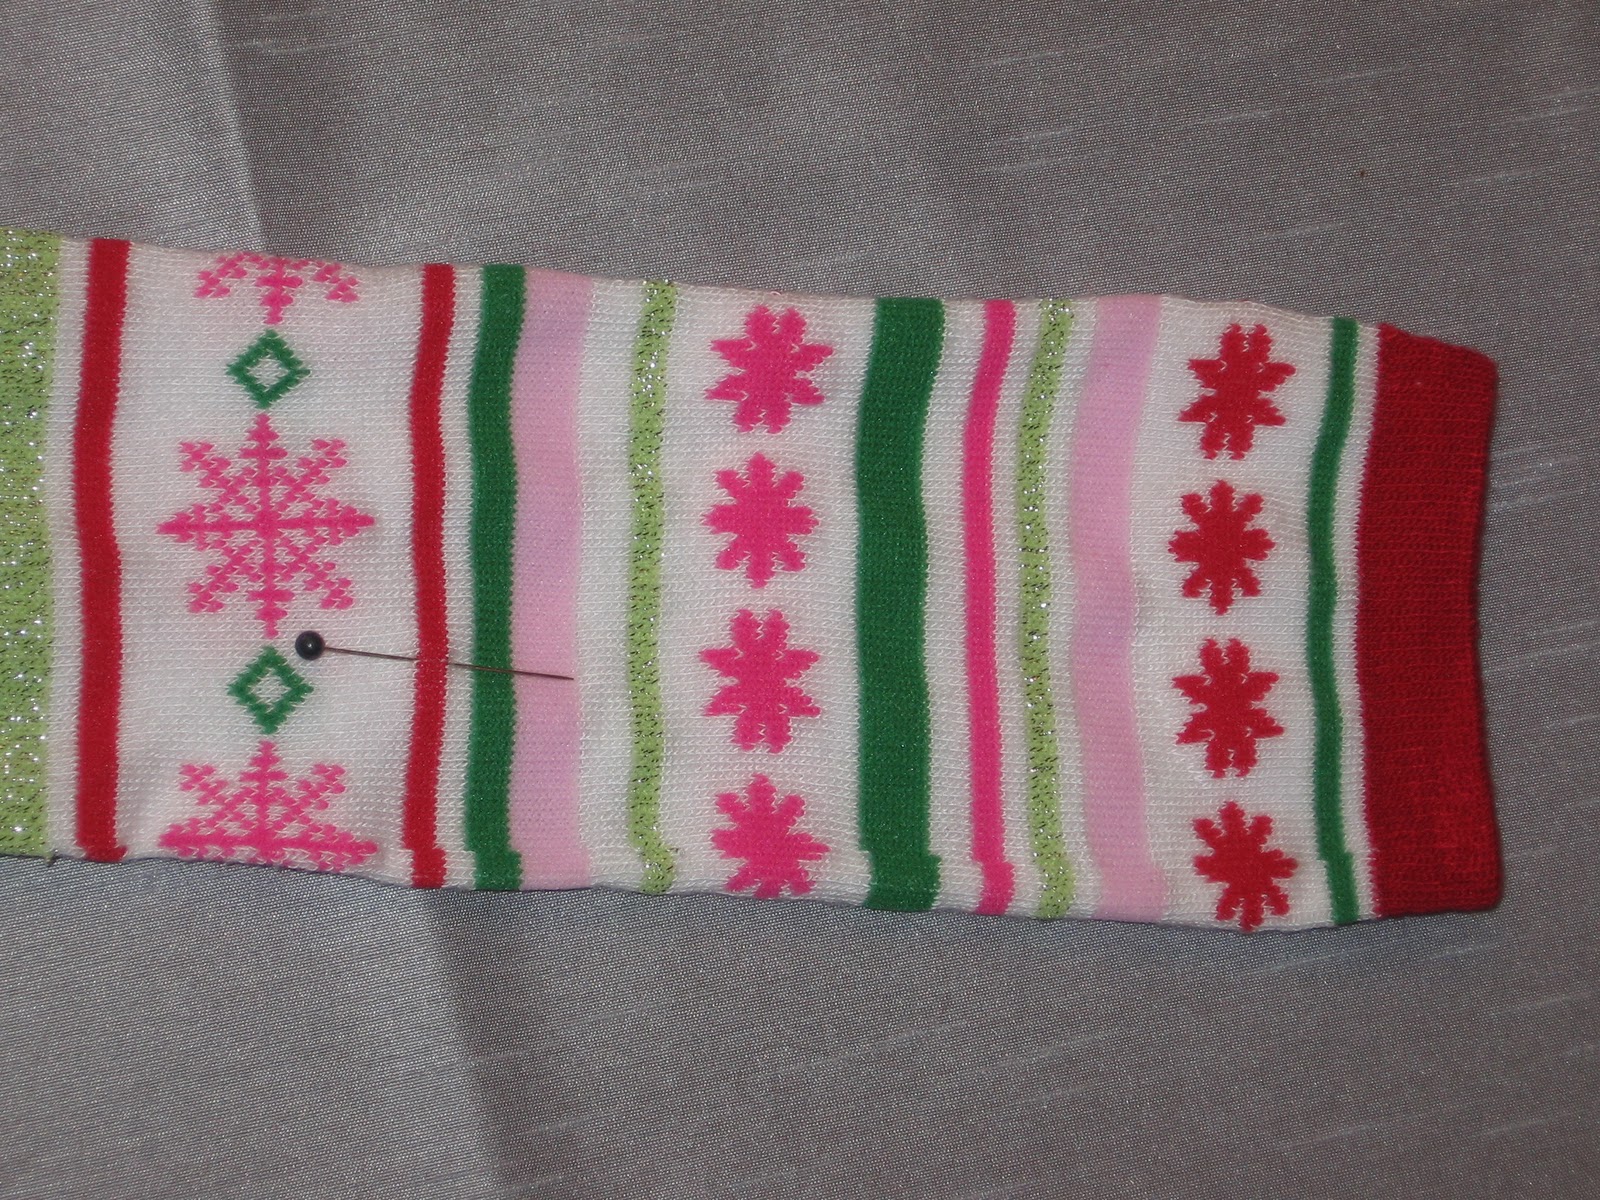
2.5 months: bumGenius diaper
Our Stash: I thought the best blend of cost and convenience was a "pocket" diaper, like bumGenius. I then discovered how much I love the convenience of the 2-piece Flip diaper system. So our "stash" consists of 13 velcro bumGenius, 5 Flip diaper covers, 1 Econobum diaper cover (that I got for free for spending $50 at cottonbabies.com), 5 Flip stay-dry inserts and 24 regular-size unbleached cotton prefolds. The only ones I got new were the prefolds and half of the bumGenius. I do have a few random borrowed diapers that I rotate in our stash occasionally from my sister-in-law and my friend. We also spent about $40 for cloth newborn-size diapers so our daughter could wear cloth diapers from birth (the one-size ones SAY they fit from 8lbs, but they really fit from about 6 weeks old, or whenever your baby gets some leg fat). I was glad to have this more comfortable, natural option for our daughter when she was so tiny.
7 months: Econobum cover over prefold
For all my disposable-using friends who are actually reading this blog with interest, thank you! I hope this has been informative. I understand that not everyone wants to or can use cloth diapers. If you are willing to think about it though, there is a great movement out there on facebook called Change 3 Things that challenges non-cloth diaper users to try using just 3 cloth diapers a day. The impact on your wallet and our planet will truly be significant. And if you have any questions at all, this is something that I'm very passionate about and would love to talk with you about!

7.5 months: bumGenius diaper